Yet another revolution from Microsoft I can say.
This wonderful tool which helps to create smart mashups and web designs using Microsoft Silverlight as one of its component.
It is a unique publicly available tool which can be used with Windows Live ID, so rush if you don't have Windows Live ID.
Right now though it is online,but it can be integrated with Visual Studio, you need to download Popfly Explorer so as to use it with Visual Studio.
I will surely cover that part in my upcoming article.
When you done with your Live ID registration or if you have it already then..let's start.
Step 1: Login and Choose Create a Mashup option.
First go to :
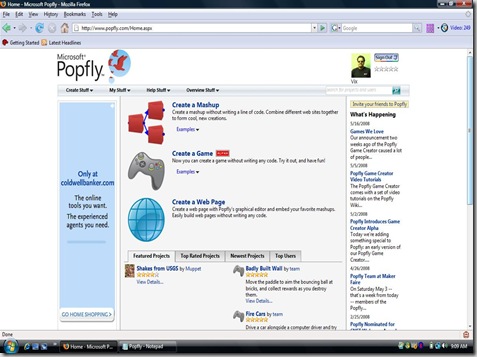
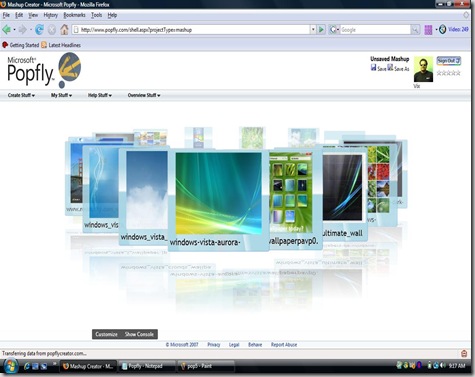
You will see the following screen.
We are right now considering the simple Mashup, So choose "Create a Mashup" option on screen which is first option or you can choose it from "Create Stuff" Menu option on menu bar.
Step 2: Choose Right Block for Mashup
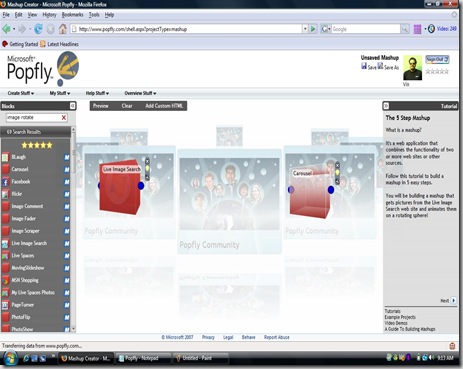
This is total part of one's creativity, you have lots of choices to be chosen from Blocks provided by Popfly on left hand side, see the image below.
either you pick one of them or you can search them by search option provided on top. Middle part is what you can call as design interface or arena where we will put our blocks, mostly Drag and Drop from left side toolbox.
I have chosen two blocks for my Mash development, Live Image Search and Photo Carousel.
Behind the scene, its quite simple logic..image search result will be displayed on Carousel output block, we just need to set parameters.
Step 3 : Set Parameters for Block
Now please see the following image,
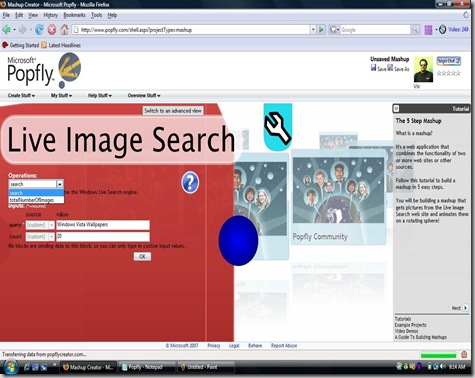
You can see a Blue Image on top, where you can see a symbol of some gauge, you just need to click on it and it will zoom up the block for you, an Interface will be thrown where user can choose operations, these operations are differ from block to block, depends on what block you have chosen, it might be different for Facebook block and totally different for Live Maps.
Once you set parameters, In this example I have set them as "Windows Vista Wallpapaer" and "20" so finally it suppose to show me 20 images on my Carousel.
Click on Ok to save those and you will again thrown back to initial screen.
Step 4 : Combine two Blocks
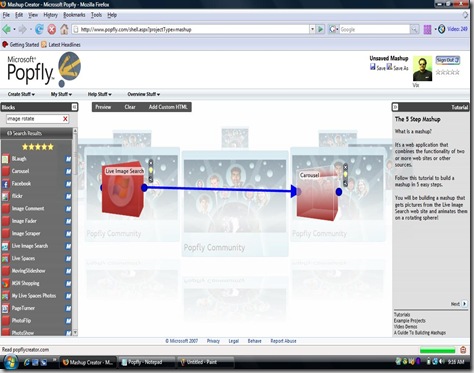
Now you need to combine two blocks to archive final expected result, You just need to click on Blue color circle on Left which is a Live Image Search Block and drag it to circle at right on Carousel Blue color circle and you will see a arrow going form left to right, which means data/parameters will flow from Live image search block to Carousel block. See the image below.
Step 5 : See the Final Output
Now you just click on "Preview" option which is at top and below menu bar and you will see the following result
You done with it !!
Step 6 : Deploy it on your Blog !!
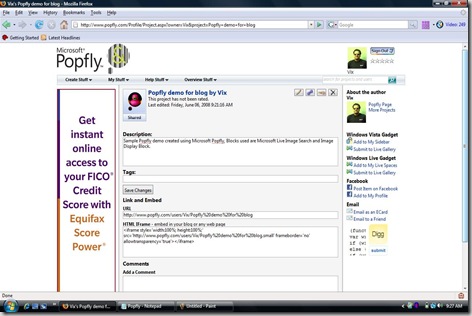
So, its time for real action and so as to deploy it on your blog/live spaces etc. first click on "Save"/"Save As" which are at top of screen, Once you save them, you will find a button "i" just next to save option,which is on mouse over will show you message as "Get information", click on it and you will get following setup kind of window on your screen.
Here you need to click on Third option on Top as "Share" this project. You will find a HTML [iFrame] code which you just need to copy paste on your blog's HTML section and you are done with it. if you wish to see how it looks like when you put it on Blog, visit following URL and see the bottom most section.
http://pendsevikram.blogspot.com
Hope, this will encourage all developers to start using Popfly technology, I will back with more soon.
Thanks,
Vikram.
3 comments:
Hi Vikram , really nice article :)..keep blogging !! :)
Thanks Raza!
hi..
hey thnx a lot for ur encouragement..
man ur blog is really awesome !
hey btw how did u come to know that i created my blog.. ?
mayur told u kya ?
anyways will try to maintain a good blog from now on..
Post a Comment